Contact: John Tao
Mobile/WhatsApp: +86 186 6862 7050
Email. Johntao@Fupusi.com
www.Fupusi.com
John Tao as the General Manager of Taizhou Fupusi Machinery Co., Ltd., who has more than 15 years of experience in the plastic bottle industry field, is focused on improving the quality of the machines and the after-sales system
- Other
·Safety device inspection:
To prevent any accidents, it is necessary to check the emergency stop device before operation.
·Lubricant:
Provide lubricant for each sliding component.
·Before operation, check and ensure that there is no one inside the machine.
II. Adjustment before startup: - Feeding system:
(1) Prefabricated component positioning: The height of prefabricated component positioning depends on the longitude of the prefabricated component.
Place the robotic arm and preform above the spindle, then loosen the fixing bolts and adjust the distance between the firing pin and the bottom of the preform to 5 mm.
(2) Robot arm: The size of the robot arm depends on the size of the preform. You should remove the bolts and nuts from your hand for replacement. After replacement, test whether the height of the hand is correct.
(3) Slide: The grooves on the slide are adjusted according to the size of the prefabricated components. For example, if the prefabricated components are inconsistent or the screw size changes, the feeding plate should be replaced. The update method is to remove the bolt on the slider and fix the new slider.
(4) Feed rail: The size of the feed rail depends on the size of the prefabricated component. There are sets of bolts and nuts for adjustment at the front and back of the inclined section. The gap between prefabricated components and steel rails is 0.5mm.
Attention: When the robot moves prefabricated parts, first raise the impactor to avoid collision with each other.
2 Transportation system:
1 Lining: The size of the lining is determined by the internal dimensions of the preform. When the internal dimensions or height of prefabricated components change, the lining should be replaced. Remove the C-shaped spring from the spindle and replace the bushing.
Attention: Before adjusting the positioning of prefabricated components, the lining should be replaced in advance.
3 Heating device:
(1) Cooling water slope: Place a prefabricated rod on the main shaft inside the heating furnace, adjust the cooling water slope so that it is about 2mm away from the prefabricated rod, as shown in the following figure:
(2) Infrared lamp: If the heating of the preform is uneven, the distance between the preform and the lamp should be adjusted. Loosen the fixing bolts at both ends of the light adjustment rod, move the light back and forth in the correct position, and then lock it.
4 Emission system:
Mechanical arm: The method of adjusting the unloading mechanical arm is the same as that of feeding. After placing the prefabricated components on the spindle, test the gripping ability of the robotic arm, as shown in the following figure:
5 High pressure air:
(1) Work pressure: Adjust the regulator pressure to 7 kg/cm2.
The pre installed pressure for gas recovery is 10 kg/cm2.
(2) Blowing pressure: maximum 28 kg/cm2 for circular bottom; The maximum weight at the bottom of the free bracket is 35 kg/cm2.
(3) Pre blowing pressure: about 5-15 kg/cm2.
III. Opening steps:
Before opening, check the inside of the machine to ensure that everyone has left.
- Open the intake valves of the working pressure system and high-pressure purging system.
- Check if the work pressure is correct.
- Adjust the pre blowing pressure according to the production situation of the bottle.
- Open the inlet and outlet ball valves for cooling water and chilled water, and check whether the cooling water track of the heating furnace and the circulation of the mold chilled water are smooth.
- Turn the power switch to the “ON” position.
- Turn the selector to the “Manual” position – Origin – Origin Complete – Open the mold.
- Check if the feeding track, material handling machine, and conveyor are functioning properly.
- Set the temperature of the preset heating oven and turn on the heating lamp to adjust the power required for the bottle.
- Switch the screen to “Auto”
After the heating furnace reaches the preset temperature, press the automatic start button. - Observe the quality of the bottle and adjust the heating temperature, time, and pressure.
Attention: Do not open any safety doors while the machine is running to avoid any damage.
IV. Control panel:
1 Power selector:
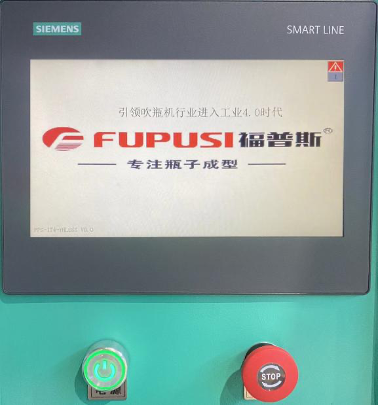
1 Power button:
Turn on the power, and the control panel will display a startup screen. Click on the Fupusi logo to enter the main menu.
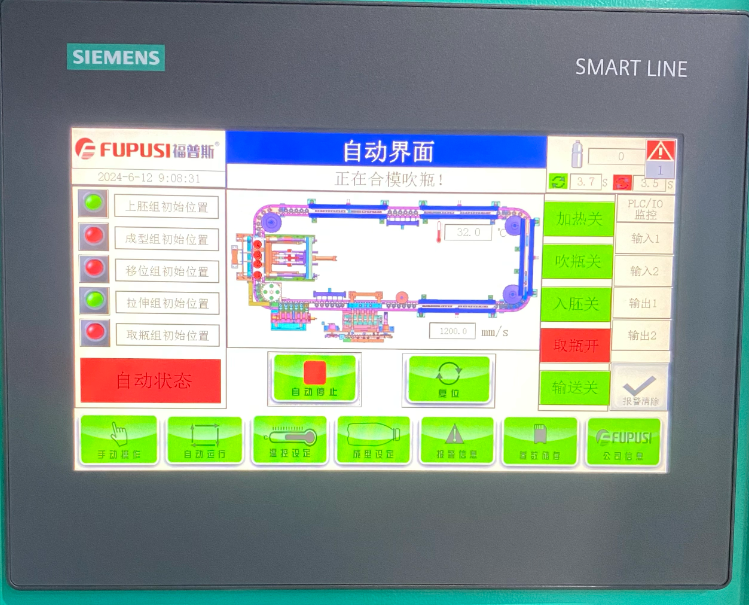
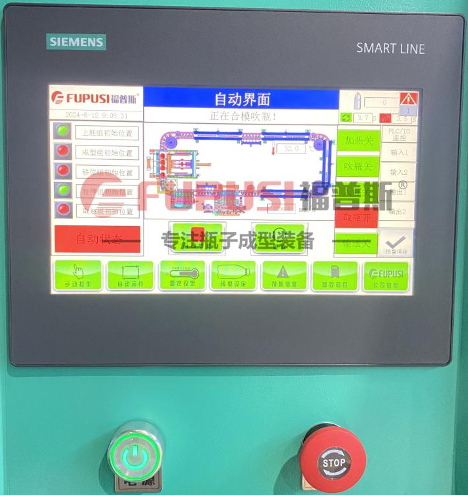
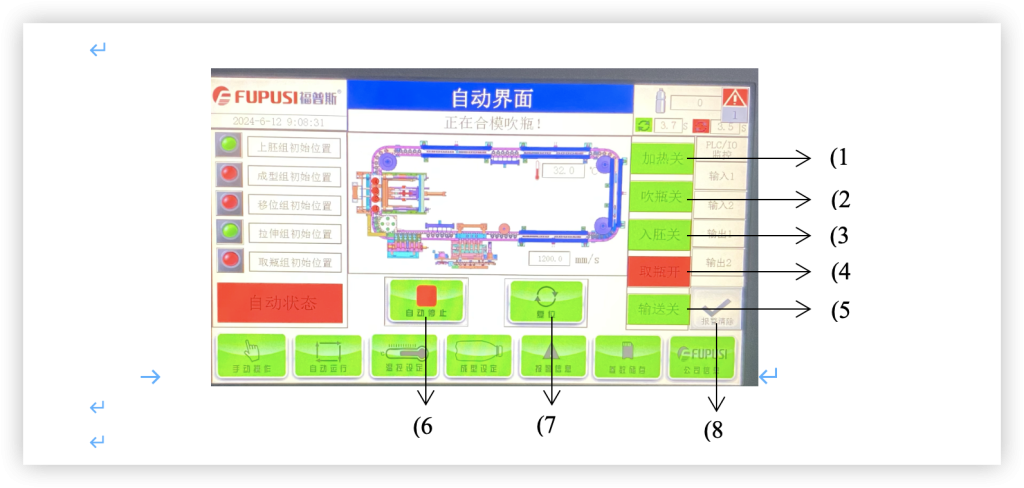
- Main interface in automatic mode:
1 Time display: System date/time.
2 Counter: Record production quantity (long press production quantity to reset data)
3 Alarm display: Reason for machine malfunction.
4 Set cycle: Machine set cycle.
5 Actual cycle: Machine action cycle time.
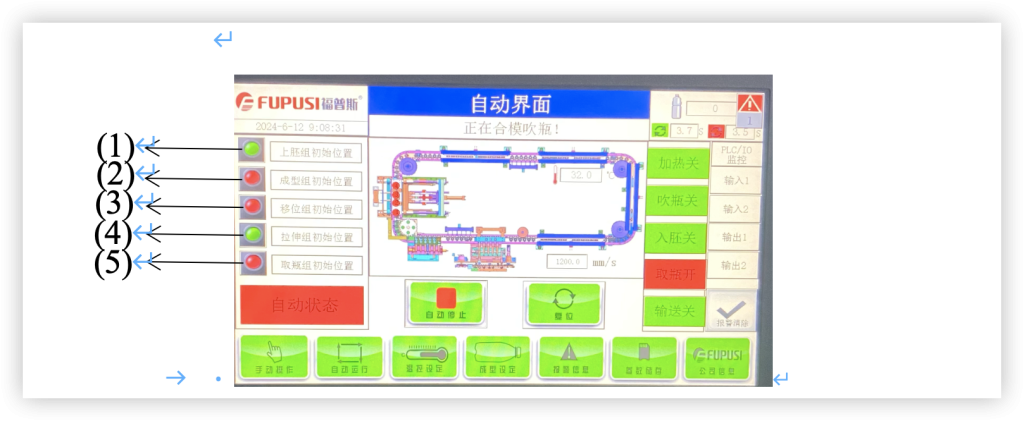
(1). Initial position of upper embryo group:
(2). Initial position of forming group:
(3). Initial position of shift group:
(4). Initial position of stretching group:
(5). Initial position of bottle collection group:
(1). Heating switch: controls the heating function of the lamp tube
(2). Bottle blowing switch: controls the machine’s bottle blowing function
(3). Upper embryo switch: controls the bottle embryo to enter the intake air
(4). Bottle retrieval switch: controls the bottle retrieval action
(5). Conveyor switch:
(6). Automatic stop:
(7). Reset:
(8). Alarm clearing:
Attention: Before starting, check if the voltage setting is abnormal. If the bulb is damaged, be sure to turn off the power before replacing it to avoid electrode or short circuit events
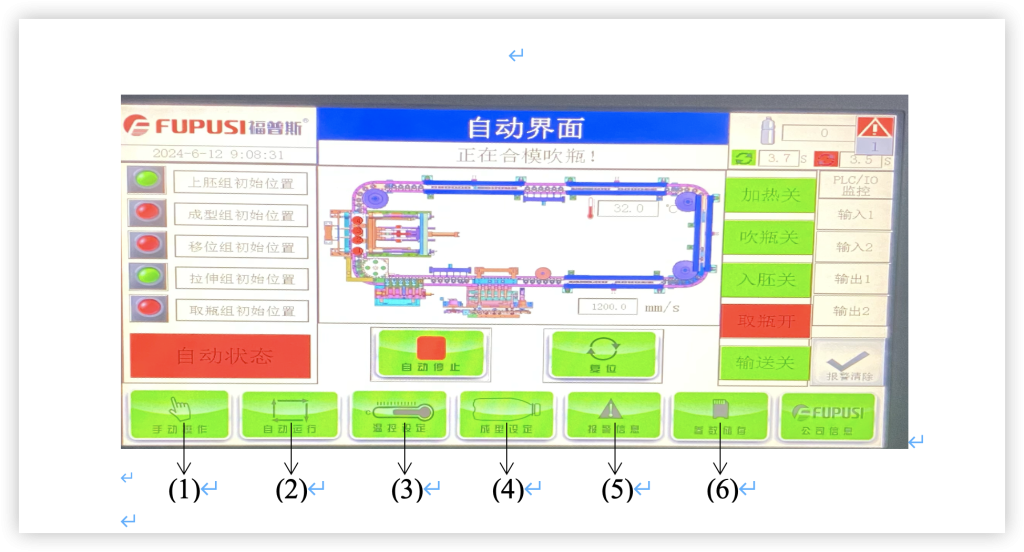
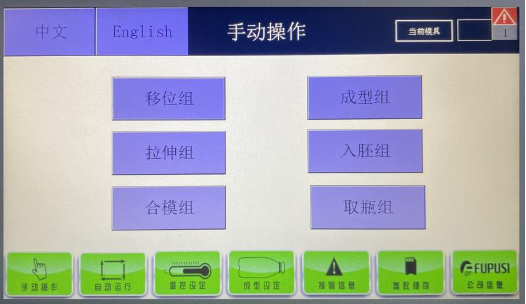
1 Manual operation:
By selecting manual operation, the operation status of the bottle blowing machine will switch to manual control mode. Manual mode can be used for troubleshooting calibration group, displacement group, stretching group, etc., which is particularly beneficial for preventing accidents.
(2). Temperature control setting: oven lamp heating setting
(3). Molding setting: By reasonably setting parameters such as delayed pre blowing, delayed blowing time, blowing time, and exhaust time, the molding quality and production efficiency of the product can be ensured.
(4). Alarm information: When the device encounters abnormal conditions and meets the alarm conditions, the system will immediately trigger the alarm mechanism to ensure that the equipment fault information can be promptly and accurately conveyed to relevant personnel
(5). Parameter storage: Archive and independently save different parameters that need to be set according to different molds, and read them directly for easy use in the later stage
V. Troubleshooting:
Attention: Regardless of any abnormal situation, the operator should first press the emergency stop button to stop the machine from running.
When the machine runs abnormally, the HMI (control panel) screen will display an alarm message indicating the abnormal situation.
(1) Feed (alarm information):
The machine stops running and the screen displays the message ‘Feed assembly error’.
Reason 1: Inaccurate positioning of prefabricated components resulted in impact and blockage of feed.
Solution: Drain the operating system pressure and remove obstacles. After refilling the operating system pressure, manually operate the feeding component to determine if the fixture can accurately process the preform. If necessary, readjust the components.
Reason 2: The cylinder sensor is not aligned.
Solution: Loosen the sensor fasteners and adjust the sensor position until it lights up again.
(2) Unloading (alarm message):
The machine stops running and the message ‘Unloading Assembly Error’ appears on the screen.
Reason 1: Impact occurred during the movement of the unloading handle, resulting in inaccurate bottle handling or component blockage.
Solution: Drain the operating system pressure and remove obstacles. Refill the operating system pressure and manually operate the unloading component to determine if the handle can accurately handle the bottle. If necessary, readjust the components.
Reason 2: Cylinder sensor not aligned
Solution: Loosen the sensor fastener, adjust the sensor position until it lights up again.
(3) Mold (alarm information):
The message ‘clamping pressure error’ appears on the screen, and the machine stops running.
Reason 1: Due to foreign objects getting stuck, the clamping press did not fully open or close.
Solution: Manually remove the foreign object and open/close it multiple times to ensure its normal operation.
Reason 2: The positioning sensor for opening/closing the mold is not in place.
Solution: Check the servo zero positioning, inspect the sensor for left/right open/close mode, and check if the fixing bolts of the sensor are loose or if there is any impact when moving. Move the sensor to the position of opening/closing the mold to calibrate the sensor until the indicator light of the sensor lights up.
(4) Transmission (alarm message):
The machine stops running and the screen displays the message ‘transmission error’.
Reason 1: Due to foreign object blockage, the transmission action is incomplete.
Solution: Check if there are any foreign objects blocking the conveying system and manually operate the conveying cylinder to help clear the obstacles. Press the “forward” button several times to confirm whether the preform spindle is accurately positioned to the next position without interfering with the clamping system.
Reason 2: The transmission cylinder and servo position sensor are not in place.
Solution: Check if the sensors on the cylinder and servo system are misaligned due to vibration. Reposition the sensor until it lights up, then tighten the fastener to secure it in place.
Reason 3: The transmission cycle time is longer than usual.
Solution: The machine is programmed to cycle 20 times during initial operation as a preform cleaning period, so the conveyor system runs slowly until the clamping system is activated once, and the machine will return to its “normal cycle time”.
(5) Slide (alarm message):
The message ‘slider error’ appears on the screen and the machine stops running.
Reason 1: During operation, there may be foreign objects hitting or jamming the slider
Solution: Remove obstacles and manually operate the slider to check if the preform can be correctly loaded onto the bracket.
Reason 2: The position sensor of the slider cylinder is misaligned.
Solution: Check if the sensor fasteners are loose, adjust the sensor position until it lights up, and then tighten the fasteners.
6 Telescopic pole (alarm message):
The message “stretching rod error” appears on the screen, and the machine stops running.
Reason 1: During the operation, foreign objects impacted or stuck the stretching rod component
Solution: Remove the blocked object, manually operate the stretching rod assembly, and check if its function is normal. Please ensure that the gap between the rod and base mold remains unchanged.
Reason 2: The sensor position for the upward or downward stretching rod is incorrect
Solution: Check if the two sensors can correctly detect the corresponding position of the stretching rod assembly, and adjust if necessary until the sensors light up and tighten the fasteners.